Your FULL Disney World Lightning Lane Multi Pass Guide
If you’re looking for a Disney World Lightning Lane Multi Pass guide that has it all from a step-by-step tutorial to the best Lightning Lane Multi Pass strategy for each theme park…you’re in the perfect spot!
I’ve made it my goal for you to feel as if this guide is bookmark-worthy! I want to give you something to be able to come back to whenever needed as you plan your Disney World vacation.
So, in this article, you’ll find a deep dive into how to use Lightning Lane Multi Pass and a solid Lightning Lane Multi Pass strategy. That way, you feel confident going into your park day!
Disclosure: You may see affiliate links throughout this post, which means these are the things I handpicked! If you purchase something through these links, I will get a small commission at absolutely no extra charge to you. And that sure means a lot to me, so thank you in advance! See the privacy policy for more information.
Lightning Lane Multi Pass vs Lightning Lane Single Pass vs Virtual Queue: The Basics
For yearsss, Disney World has had some sort of service to allow you to skip the standby lines at attractions. Back in the day, it was FastPass. Then FastPass+…then Genie+…and now, Lightning Lane Multi Pass.
So, let’s jump into it. I’m going to try to break this down as straightforwardly as possible.
Note: it helps to have your phone out to click through as you’re reading this, so you can see exactly what I’m talking about.
What is a Lightning Lane at Disney World?
Just to set the stage, let’s start out with a mini vocab lesson because I swear Disney has its own language!
A Lightning Lane is the actual queue you walk through to get to the attraction (instead of using the standby queue). The entrance to the Lightning Lane is labeled at each attraction.
In order to go through the Lightning Lane, you’ll make a reservation for that attraction, which is what this article will get into! Then you’ll scan your MagicBand or park ticket at the touch point to enter.
Throughout this article, you’ll see me talk about your Lightning Lane “return time.” That just means the time in which you will visit the attraction. When you book your Lightning Lane reservation, you will get to choose an hour-long return time.

Lightning Lane Multi Pass
What is Lightning Lane Multi Pass?
Lightning Lane Multi Pass is a paid service that gives you access to book your Lightning Lane reservations on the My Disney Experience app.
It allows you to skip the standby queue at whichever attractions you make a reservation for.
How much does Lightning Lane Multi Pass cost?
The price for Lightning Lane Multi Pass may vary each day of your trip. It will also vary based on which park you want to purchase Lightning Lane Multi Pass for.
You can expect to be spending at least $16 (plus tax) per person per day (probably more!).
Kids under 3 years old do not need a park ticket to enter the parks. And, therefore, will not need to have Lightning Lane Multi Pass to go through the Lightning Lane with you. Whoop, whoop!
What’s included in Lightning Lane Multi Pass?
When purchasing Lightning Lane Multi Pass, you will be able to pre-select 3 Lightning Lanes before your trip even begins. Then, you’ll be able to book even more Lightning Lanes on your park day. (I promise I will get into allll of those details in a bit!)
When you book a Lightning Lane, you will choose a return time that’s an hour long. You can visit the attraction and go through the Lightning Lane whenever you’d like during that return time.
By using Lightning Lane Multi Pass, you will have access to book Lightning Lanes at almost any attraction in the theme park you’re visiting. “Almost” being the key word.
In each of the 4 Walt Disney World theme parks, there is a ride or two that you will need to purchase separately if you want to bypass the standby line. For those attractions, you can purchase a Lightning Lane Single Pass, which we’ll discuss in a second.
The second biggest perk of purchasing Lightning Lane Multi Pass is that you’ll get to download your Disney PhotoPass ride photos for free from your My Disney Experience app even if you didn’t purchase the PhotoPass Memory Maker package.
In addition to saving time in the queue and getting your ride photo downloads, Lightning Lane Multi Pass also gives you access to Disney PhotoPass Lenses.
These allow you to take fun pictures in the theme parks by adding special Disney filters to photos (which has become a fun pastime while sitting on Disney transportation on our way back to our resort after a day at the parks!).


Lightning Lane Single Pass
What is Lightning Lane Single Pass?
Lightning Lane Single Pass is an “a la carte” Lightning Lane reservation that you can purchase for select attractions at a separate fee.
These attractions are not included in the Lightning Lane Multi Pass service.
How much does a Lightning Lane Single Pass cost?
The cost of Lightning Lane Single Pass will vary per ride and may even vary per day.
You can expect to pay anywhere from $11 to $25 (plus tax) per person when booking a Lightning Lane Single Pass for an attraction.
Lightning Lane Single Pass Rides at Disney World
Magic Kingdom Lightning Lane Single Pass
- Seven Dwarfs Mine Train
- TRON Lightcycle / Run
Hollywood Studios Lightning Lane Single Pass
- Star Wars: Rise of the Resistance
Epcot Lightning Lane Single Pass
- Guardians of the Galaxy: Cosmic Rewind
Animal Kingdom Lightning Lane Single Pass
- Avatar Flight of Passage
Booking Lightning Lane Single Pass
You do not…I repeat, you do NOT…need to purchase Lightning Lane Multi Pass in order to purchase/book a Lightning Lane Single Pass. But you can purchase both Lightning Lane Multi Pass and Lightning Lane Single Pass for your day at the Walt Disney World theme parks if you want.
Either way, you’ll be able to purchase and book up to two Lightning Lane Single Passes per park day during the same pre-selection booking window as Lightning Lane Multi Pass. And they don’t have to be in the same park if you have the Hopper option on your park ticket.
TIP: While you can book your Lightning Lane Single Passes for your park day in the same transaction as your Lightning Lane Multi Pass pre-selections, you might want to book them in different transactions for a couple of reasons:
- If you only want to book a Lightning Lane Single Pass for certain members of your party (for example: even though my oldest is big enough to ride TRON, he doesn’t want to), you’ll have to purchase the single passes in a separate transaction and select only the people who want to ride.
- While you can somewhat overlap your Lightning Lane return times, I’ve found you can get even better overlapping times between the single passes and the Multi Pass pre-selections if you book them in separate transactions.

Virtual Queue
Now, the Virtual Queues are completely separate from any of the Lightning Lane services offered at Disney World.
What is a Virtual Queue at Disney World?
A Virtual Queue essentially allows you to wait in line at select attractions…virtually (for lack of better words!) instead of physically. So, you can go about your park day, then head to the attraction whenever the notification pops up on your phone that it’s your turn to ride.
It’s good to note that if you join a Virtual Queue, that does not give you access to the Lightning Lane at the attraction. You will still have to wait in the standby queue once you return to the attraction after your group has been called (which can sometimes be quite a bit of a wait).
How much does a Virtual Queue cost?
Joining a Virtual Queue is FREE for all guests!
Attractions with Virtual Queues at Disney World
animal kingdom
Bluey’s Wild World at Conservation Station
Joining a Virtual Queue
Unlike Lightning Lane Multi Pass and Single Pass, you cannot join a Virtual Queue until your actual park day. The ability to join a Virtual Queue opens up at 7 AM for all guests and at a second time (a little later in the day) for guests who are currently in the park.
You will only be able to join a Virtual Queue for one attraction at a time during the day. And remember, this is a completely separate service from the Lightning Lane services.
To join a Virtual Queue:
- Open your My Disney Experience app.
- Scroll down on the main page and click “Join a Virtual Queue” – OR – Click the 3 lines in the bottom right of the screen, then scroll down and click “Virtual Queue.”
- Choose the Virtual Queue you want to join.
- Confirm your party.
- Click “Join Virtual Queue.”
Make sure to click through the prompts quickly, as Virtual Queues can book up fast!
Once you’ve joined the Virtual Queue, you will be given a Boarding Group, and you’ll have one hour to return to the attraction once your Boarding Group is called via notification from the My Disney Experience app.

How to Use Lightning Lane Multi Pass: Step-by-Step Tutorial
Ok, it’s the moment you’ve been waiting for! Exactly how to use Lightning Lane Multi Pass. Let’s do this…
What to Do Before Purchasing Lightning Lane Multi Pass
There are some KEY things you’ll want to do before your Lightning Lane pre-selection booking window opens to make sure everything goes smoothly.
Download the My Disney Experience App.
Rule #1 when it comes to planning any Disney World vacation: download and set up your My Disney Experience app.
Not only will there be more useful things than you can count on that app, but it’s absolutely essential to have the app on your phone if you want to use the Disney World’s Lightning Lane service.
So, download it…click through it…look at attraction wait times while you sit in your house 1000 miles away (not that I do this on a regular basis or anything! Ha!). Just get to know it, so you have a general idea of where things are in the app before you even step foot in Disney World.
Planning a day at the Disney World parks *can* be overwhelming! But it doesn’t *need* to be.
Subscribe to my newsletter and get a FREE daily Disney World park planner to help prioritize and organize your day, so you can have the vacation you’re dreaming of.
Make sure your park tickets are linked in your My Disney Experience App.
You will not be able to purchase Lightning Lane Multi Pass or Single Pass if you don’t have a park ticket. Simple as that.
So as soon as you purchase your park tickets, check to make sure you can see them in your app. You can do this by following these steps in your My Disney Experience app:
- Click the 3 lines in the bottom right corner of the app.
- Click “My Tickets & Passes.”
If you don’t see your park ticket, click the (+) button in the top right corner. From there, you’ll be able to purchase or link your tickets.
Make sure everyone in your party is on your Family & Friends List.
Setting up your Family & Friends List may be one of the most important steps during the planning phase. In order to plan as a group (which includes booking Lightning Lanes as a group!), you’ll need to be linked to each other in the app.
To set up your Family & Friends List on the My Disney Experience app:
- Click the 3 lines in the bottom right corner of the app.
- Scroll down and click on “Profile.”
- Click “Family & Friends List” at the top of the page.
- If you do not see someone you’ll be traveling with, click “(+) Add a Guest” and follow the prompts.
It helps if all adults have their own My Disney Experience accounts prior to setting up your Family & Friends List. Each person will have to accept your invitation to join your list before you’re officially connected.
Want to know EXACTLY what to pack for your upcoming Disney World trip?
Snag my free Disney World packing checklist by filling out the form below. (And how do I know it’s EXACTLY what you need? Well, it’s the list I personally use, so it’s been through plenty of trial and error.)
When to Purchase Lightning Lane Multi Pass
If you’re staying ON Disney World property or at select good neighbor hotels…
you will be able to book 3 Lightning Lanes per park day for your entire trip, 7 days prior to your check-in date beginning at 7:00 AM Eastern. Such a huge perk for on-property guests!
This early booking window applies to guests staying at any of the following resort hotels:
- ALL Walt Disney World Resorts (I’m talking anything from a value resort to a Disney Vacation Club villa…and everything in between!)
- Walt Disney World Dolphin Hotel
- Walt Disney World Swan Hotel
- Walt Disney World Swan Reserve
- Shades of Green Resort
If you’re staying OFF Disney World property…
you will be able to book 3 Lightning Lane pre-selections at 7:00 AM, 3 days prior to the start date of your ticket for date-based tickets or 3 days prior to your actual park day for other ticket types.
If you have a date-based ticket, you’ll be able to make your pre-selections for your entire trip.
How to Purchase Lightning Lane Multi Pass
Alright, let’s imagine it’s 7:00 AM Eastern on the day your pre-selection booking window opens. Here are the steps you’ll need to follow:
- Open your My Disney Experience app.
- Right at the top, you’ll see a section that says, “Lightning Lane Multi Pass/Single Pass.” Click the “Purchase” button in that section.
- Select your park day.
- Select the park you’ll be visiting.


- Select the service(s) you’d like to purchase (you’ll find the price for the service during this step). You can choose to select Lightning Lane Multi Pass, Lightning Lane Single Pass(es), or both.
- Confirm your travel party.
- Choose your Lightning Lanes using the process described next.
- Follow the prompts to purchase the service.


If you noticed during those steps, won’t officially purchase Lightning Lane Multi Pass until you book your Lightning Lane pre-selections!
You’ll go through this process separately for every single park day that you want to purchase Lightning Lane Multi Pass and/or Single Pass for, so each park day will be a separate transaction.
TIP: If you want to get a feel for what the system looks like and how much you’re in for cost-wise, you can go through the first half of those steps up to 3 weeks prior to your trip.
Booking Your Lightning Lane Pre-Selections
When choosing and booking your Lightning Lane Multi Pass pre-selections, you’ll notice right off the bat that the attractions at Magic Kingdom, Hollywood Studios, and Epcot are divided into 2 tiers.
During this pre-selection booking window, you can choose:
ONE Tier 1 attraction + TWO Tier 2 attractions – OR – THREE Tier 2 attractions.
Since Animal Kingdom attractions do not have any tiers, all attractions are up for grabs!
After you select the attractions you want and click “Continue,” the app will give you an hour-long Lightning Lane return time for each Lightning Lane Multi Pass attraction you chose (as well as any Lightning Lane Single Pass you chose).
You can choose to keep the times given and continue on to the payment screen or you can modify the return time to something that works better for you (pending availability).
To modify a Lightning Lane during the pre-selection booking window:
- Click “(>) Modify Time” under the Lightning Lane return time you want to change.
- Search by hour, then choose a time.
- Click “Save New Time.”


Once you’re happy with all the Lightning Lane return times, scroll down to review your pre-tax cost, then click “Continue.”
You will have 5 minutes to complete this booking process for your park day. There will be a timer at the top of the page for you (you can see it in the screenshots above)!
If the 5-minute timer expires, you will lose the Lightning Lane return times that you were in the process of reserving, and you’ll have to start over.
There you have it…your Lightning Lane Multi Pass pre-selections are made! Now pat yourself on the back because you just rocked that!
Modifying Your Lightning Lane Pre-Selections
You can modify your Lightning Lane pre-selection times and days at any time (and as often as you want!) prior to your trip. So, if you didn’t snag your *perfect* return times or your plans change, you can play around with it a bit!
To modify your Lightning Lane pre-selections, open your My Disney Experience app and follow these steps:
- Click the 3 lines in the bottom right corner of the app.
- Click “Lightning Lane Passes.”
- Click on the Lightning Lane you want to modify.
- Click “Modify Selection.”
- It will show you the “Earliest Time Available.” Click “Change to This Time.”
- It will give you the actual return time that is available (which is not always the same as what it initially showed!), then you can click “(>) Modify Time.”
- Search by hour, then choose a time.
- Click “Save New Time.”
- Scroll down to confirm your party and click “Continue.”


Using Lightning Lane Multi Pass on Your Park Day
The Lightning Lane rules in the park are super simple!
As soon as you scan into a Lightning Lane or once the Lightning Lane expires, you can immediately book another one. And you can repeat this after every single Lightning Lane is used/expired.
To top it off, you can book any ride in any tier pending availability, no matter if you initially scanned into a Tier 1 or Tier 2 attraction.
You can also modify any Lightning Lane you need to by following the same steps above.
To see if you’re eligible to book another Lightning Lane, you can check the very top of the main page of your app, the “My Day” section, or:
- Click the 3 lines in the bottom right corner of the app.
- Click “Lightning Lane Passes.”
- Right at the top, it will tell you if you’re ready to book your next Lightning Lane or not. If you are, just click on “Book” and follow the prompts.


You can also click on an attraction from the “Wait Times & Showtimes” page to book your Lightning Lane if you already know you’re ready to book.
Checking “Wait Times & Showtimes”
Another super helpful tool while you’re at the parks (or even while you’re at home counting down to your trip just because it’s fun to look at!) is the “Wait Times & Showtimes” page
On this page, you’ll find all the attractions in the park, the current wait time, which attractions offer Lightning Lanes, and the current Lightning Lane availability.
To get to “Wait Times & Showtimes” page in your My Disney Experience app:
- Click the (+) button on the bottom center of your app
- Click “View Wait Times & Showtimes”
How to Use Lightning Lane Multi Pass with a Park Hopper
Using Lightning Lane Multi Pass with a park hopper ticket is a bit unique.
What you’ll do is choose just ONE park to make your 3 Lightning Lane pre-selections at (there is no multi-park option!), so you’ll follow the instructions already listed above for that process.
But after scanning into your first Lightning Lane on your park day, you’ll be able to book your next Lightning Lane for any ride of any tier in any park of your choice! (Whoa…that’s a lot of “any’s.”)
At that point, you’ll also be able to modify your existing Lightning Lanes to any ride of any tier in any park.
So, while the options initially seem limited, they end up being endless…based on availability of course!
Lightning Lane Multi Pass Stragey with a Park Hopper
As you can imagine there is a bit more strategy that comes into play using Lightning Lane Multi Pass with a park hopper. Here are some things to consider:
- The cost for Lightning Lane Multi Pass varies between the theme parks with Animal Kingdom always being the cheapest. If budget is a priority, you could save some money by booking your Lightning Lane pre-selections and starting your park day at the cheapest park. Then start booking future Lightning Lanes or modifying existing Lightning Lanes to a different park once you scan into your first Lightning Lane.
- You can book your next Lightning Lane as soon as you scan into your first one, so scanning into your first Lightning Lane as early as possible can be key to maximizing the service. With that in mind, you might want to start your park day at a park in which you know you’ll use the service instead of booking your pre-selections at your second park in the afternoon.
- Some Lightning Lanes “sell out” (AKA no longer have availability) quickly, so if one of those attractions is a high priority for you, you’ll want to purchase Lightning Lane Multi Pass for and book your pre-selections at the park where those attractions are located.
Decisions, decisions, decisions!
General Lightning Lane Multi Pass Strategy
While the nuts and bolts to Lightning Lane Multi Pass seem easy, there’s definitely some strategy that goes into it to help maximize the service. Let’s talk about a few different options, starting with the strategy that, I think, is the way to go.

For the Early Risers
Now, with this recommendation, you might be totally excited…ooor you might be like, “Jenn. You have got to be kidding me. Wake up early on vacation?!” But hear me out…
The absolute best way to get the most out of Lightning Lane Multi Pass is to start your day early.
Why? Because the second you scan into a Lightning Lane on your park day, you’ll be able to book another one. So, the earlier you scan in, the earlier you get a chance at another Lightning Lane.
You’ll notice the attraction return times start to get later in the day pretty quickly for some rides (or they might even “sell out” – AKA no longer have availability). If you start your day later, you might have limited options for Lightning Lanes to choose from.
For this Lightning Lane strategy, try to make all of your pre-selections for morning return times. In fact, the earlier the better for the very first Lightning Lane of the day.
On your park day, I highly recommend “rope dropping,” which is just Disney lingo for getting to the park before it officially opens. If you’re staying on Disney World property, take advantage of that Early Entry perk to knock out some of your high-priority rides without the use of Lightning Lane Multi Pass.
Then, start scanning into those Lightning Lanes you booked. As you can book new Lightning Lanes, aim for either more morning return times or early afternoon times as able. Then keep it rolling! Just remember to take any midday break plans into consideration when choosing those return times.
For the Slow Mornings
Ok, but what if you’re really not an early riser?
That’s ok! Just book your first Lightning Lane of the day for as soon as you think you’ll be getting to the park, and go from there.
One thing to consider is that you might end up with more late afternoon/evening return times after scanning into your pre-selected Lightning Lanes. So, plan your day accordingly to stay out a bit later in order to maximize Lightning Lane Multi Pass.
For a Late Start
Now, you *might* not feel like you get the most out of Lightning Lane Multi Pass if you start the day late, buuut you also might surprise yourself!
I think the main thing for this strategy is mindset. You might not get as many total Lightning Lanes compared to if you were at the park the whole day. But you can still make the most of the hours you do have.
Make sure you snag the hardest-to-get Lightning Lanes during your pre-selections. These actually might be a little easier to get since you’ll want the late return times in this case. Even though you’re walking into the park late, you’ll still have 3 great attractions lined up.
From there, the good thing is that you’re already planning to be at the park a bit later (I mean, you didn’t even get there until the afternoon anyway!), so later return times won’t feel like as big of a deal.
One thing you’ll have to be okay with (and this goes back to that “mindset” stuff) is that some Lightning Lanes will no longer have availability for the day at that point.
Looking for allll of my Disney tips? (Because there’s *plenty* more where this came from.)
Instagram is where it’s at! Check out @ThoseMagicalDays — where I let loose on everything Disney to help make your trip stress-free.
How to Decide Which Lightning Lanes to Book as a Part of Your Lightning Lane Strategy
There are some key things I think about when deciding which attractions to book when using Lightning Lane Multi Pass and Lightning Lane Single Pass.
Here are the main things I consider:
- Which attractions have Lightning Lanes – I compare this to my priority attractions to see if purchasing Lightning Lane Multi Pass or Single Pass is worth it.
- Which attractions have the longest standby wait times – because, of course, I want to skip all the big lines!
- Which Lightning Lanes are the most popular – I need to know this so I know which Lightning Lanes to book before they “sell out” for the day.
- Which attractions are good “filler” attractions in between my Lightning Lanes – If I have downtime between Lightning Lanes, I want a game plan for where to go for a short standby queue.
The Best Lightning Lane Strategy for YOU
If you’re looking for a step-by-step guide to DOMINATE Lightning Lanes on your next Disney World vacation (I’m talking…enjoying a day at the parks with hardly any standby queues…buuut also not being overwhelmed by making that happen), you *need* to check out my Lightning Lane guides over on Substack.
They’ll have literally everything you’ve been looking for. 👇
FAQ About Lightning Lane Multi Pass

Is there a grace period for your Lightning Lane return time?
Your return time will be one hour long, but there’s some wiggle room.
Rule of thumb: You’ll be able to check in to a Lightning Lane 5 minutes before the start of your return time. And you’ll have a grace period of at least 15 minutes after the end of your return time.
Insider tip: While it’s not officially written anywhere, I was able to scan into my Lightning Lanes up to 70 (seventy!) minutes late with no issues. I never personally tried later than that, but I’ve heard of people having luck up to 2 hours late!
What happens if I miss my Lightning Lane return time?
I’ve found that the grace period to scan into an expired Lightning Lane is pretty generous. If you miss your Lightning Lane return time, I’d still go try to scan into the ride no matter how late you are!
Can I reserve a Lightning Lane for an attraction more than once?
No, unfortunately not. The Lightning Lane Multi Pass service only allows you to book each attraction once per day.
If you want to ride an attraction more than once, you’ll have to use the standby queue (or Virtual Queue on select attractions).

What if I change my mind and want to book a different Lightning Lane or a different time?
If you change your mind, no worries! You can modify your selection to choose a different Lightning Lane time or even a different attraction pending availability.
What happens if a ride is down during my Lightning Lane return time?
If the ride is down and your return time has come and gone, you will get a special Lightning Lane added on to your account called “Lightning Lane–Select Experiences.” As soon as you receive a Lightning Lane–Select Experiences pass, you’ll be able to book another Lightning Lane immediately.
That Lightning Lane–Special Experiences pass will be a completely separate Lightning Lane that can be used at any time throughout the day.
You can use it at the attraction you missed out on OR at almost any other Lightning Lane Multi Pass attraction (read the fine print to see which rides are included. Spoiler alert: the most popular attractions are usually not included).
While how you ultimately use your Lightning Lane–Select Experiences pass is up to you, if your heart is set on going on that specific ride that was down, I’d save your special Lightning Lane to go on that ride once it opens back up later.
NOTE: You will only be able to see this special Lightning Lane in the “My Day” section of your My Disney Experience app.

Does everyone in my party need to book the same Lightning Lanes or can we split up?
When you book a Lightning Lane, you can check off which members of your travel party you want to include in that reservation. So, if half of the party wants to do one ride and the other half wants to do another, you can split up!
When splitting up your Lightning Lane pre-selections, you can either complete two separate transactions – OR – book everyone’s Lightning Lane Multi Pass pre-selections together, then go back and modify the attractions to remove specific guests from one Lightning Lane and book a new Lightning Lane attraction for them.
Can Lightning Lane reservations overlap?
Yes! Your Lightning Lane reservations can overlap.
When making your Lightning Lane pre-selections, you’ll be able to overlap your reservations by 20 minutes at the most; however, when booking Lightning Lanes during your park day, you’ll be able to overlap them as much as you’d like.
Can you use Lightning Lane Multi Pass during after-hour events?
No, you cannot use Lightning Lane Multi Pass during after-hour events, such as Mickey’s Not-So-Scary Halloween Party. Lightning Lane reservations are only able to be made during regular park hours.
Is Lightning Lane Multi Pass worth it?
I answer that question in depth in a separate post — and go into even MORE tips on how to get the most out this service. But my overall opinion? Yeah, it’s worth it if you know how to use it!
Wrap-Up: Lightning Lane Multi Pass Guide
Woohoo!! You made it to the end of this crazy long, but SUPER detailed Lightning Lane Multi Pass guide! Make sure to bookmark it to come back to later as you continue to plan your Disney World vacation.
If this is your first time (or first time in a long time) visiting Disney World, don’t miss my ultimate planning guide.
And make sure to subscribe to my newsletter to get Disney World tips straight to your inbox every week (or two weeks or so…sometimes life with 3 boys gets a little hectic, but I try my best to keep it consistent!).
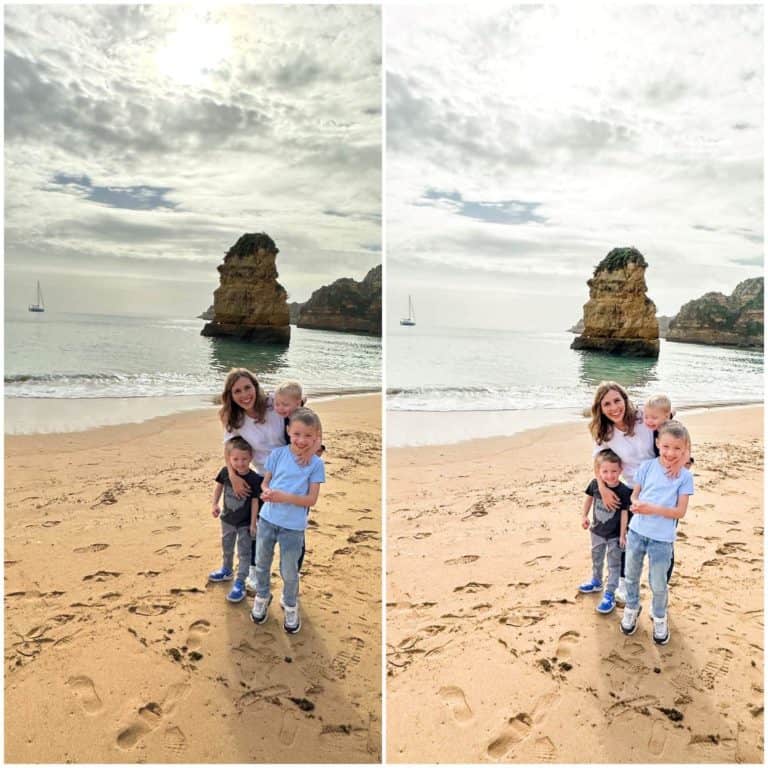
Wondering how I give my photos a bit of an oomph?
Well, let’s just say I’m a little obsessed with the Light & Airy Photographer photo editing presets.
In just one click, your photo goes from, “Aw, that’s cute,” to, “WOW!”